Tool Spotlight

Tool Spotlight: Microsoft To Do

Grab coffee, return library book, reply to email…whatever’s on your to-do list, Microsoft To Do can help you stay organized and find time for all your tasks.  

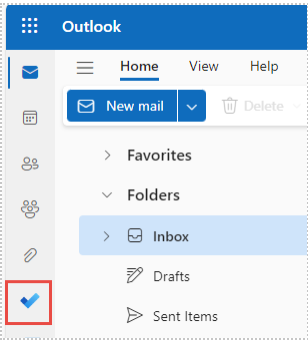
Microsoft To Do is a relatively new feature included within your Clark Microsoft account. You can access it from Outlook online by clicking the blue checkmark, or by visiting https://to-do.office.com/ in your internet browser and signing in with your Clark credentials.  

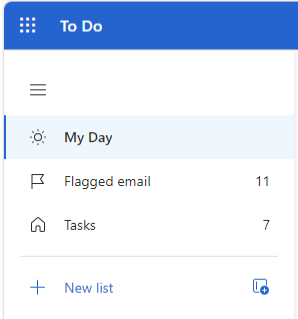
To Do is linked with your Clark email and calendar, so any flagged messages in your inbox will automatically be collected in your Flagged Email list. The My Day list includes any tasks or flagged emails due on that day, while Tasks is a complete list of every item currently on your to-do list. You can also create new lists if you’d like to organize tasks differently, such as by project or class. 

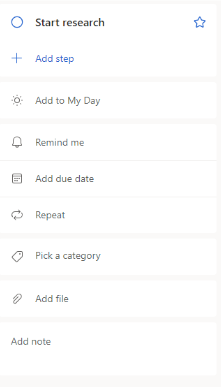
To create a new task, start typing anywhere you see the words Add a task. Once you’ve added a task, click on it to see your options, including setting a due date, adding a reminder, jotting down any notes, or repeating the task again in the future. 

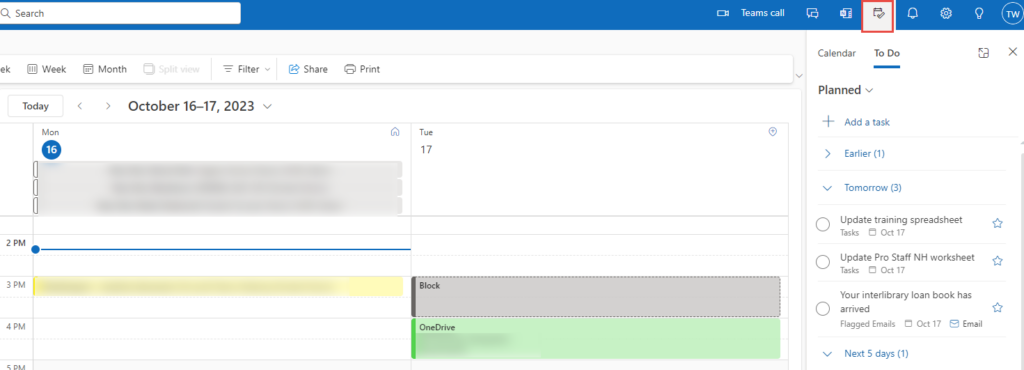
View To Do in Outlook mail or calendar online by clicking the checkmark icon in the upper right toolbar. This way, you can see important tasks and messages as you respond to email or plan out your week.  

Tip: Drag a task from the To Do window into your calendar to block off time to complete the task and build your schedule.  

Microsoft To Do is also available as an app from the App Store (for iOS) and the Play Store (for Android) so you can keep track of tasks on the go.  

Learn more about Microsoft To Do by… 

Tool Spotlight: Adobe Creative Cloud

aptop computer displaying logotypes of Adobe Creative Cloud, a set of applications and services from Adobe Systems

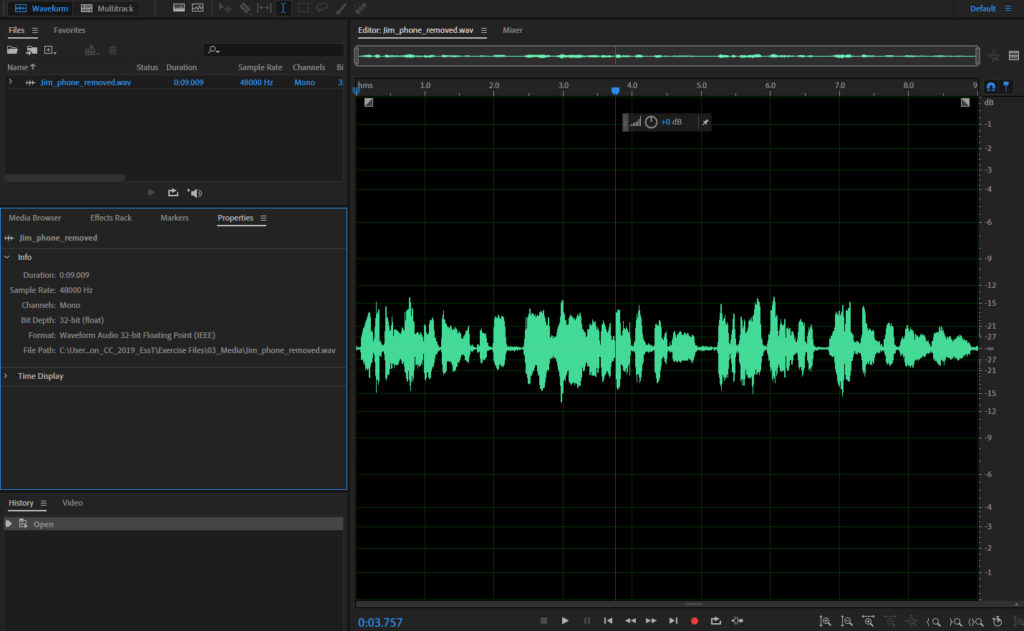
Clark University ITS is proud to now offer Adobe Creative Cloud on all public computers in addition to Adobe licenses for all faculty and staff. Creative Cloud includes many powerful tools, including Photoshop, Lightroom, Acrobat, Audition, Illustrator, InDesign, Premiere, and more!   

All Adobe applications do different things: Lightroom and Photoshop, for example, are designed for photo editing, while Acrobat is designed for editing and creating PDFs. As the collection’s name suggests, however, all of them support creative pursuits, such as podcasting, graphic design, video editing, and more.  

Since Adobe Creative Cloud includes several complex applications, ITS has a few tips and tricks on getting started and making the most of this technology. 

Tips for Getting Started with Adobe

  • Identify 1-2 app(s) that best fit your current projects. Don’t worry, there’s plenty of time to learn more later! 

Happy Creating! If you have any questions, please contact the Help Desk by emailing helpdesk@clarku.edu or calling 508-793-7745. 

Tool Spotlight: Microsoft Forms and Qualtrics

You may be familiar with Qualtrics, an online survey and research tool. Qualtrics is incredibly powerful, especially for research intensive projects. Companies such as Volkswagen and MasterCard use it to determine detailed customer information and filter response data. 

However, Qualtrics is not the only tool available to the Clark community: all Clarkies also have access to Microsoft Forms, a simplified, online data collection software perfect for less intensive projects.  

What’s the difference between the two? 

Qualtrics is ideal for research projects, surveys with multiple parts, or surveys that take a long time to complete. It is also ideal for surveys in which you’d like greater control over grouping, reminding and tracking participants, and filtering or manipulating the results. Some, however, may find it complicated.  

Forms, on the other hand, is ideal for shorter projects, such as registration, RSVPs, informal quizzes, or quick feedback. They are especially great if you want to quickly restrict participants to Clark users. Surveys on Microsoft Forms is easy to complete and view on mobile devices, and many find it more user-friendly and quicker to set up. While the results in Forms are easy to understand, they are not easily filtered or manipulated. 

Which one should I use?

The best survey tool for your project depends on the nature of the survey or research you’re creating. Ask yourself the following questions to decide which would work best for your needs: 

  • Do I want this survey to be short or extensive?
  • How much metadata do I need or want?
    • Metadata is data about data – for example, the type of computer and browser used by someone completing the survey. Qualtrics gathers more metadata than Forms.
  • Do I need to create groups of participants and track their participation?
  • Am I comfortable with manipulating response data and creating my own results report?
  • Am I interested in qualitative or quantitative data?

How can I learn more about Forms? 

Staff and faculty can schedule an appointment with the technology training specialist if you’d like to learn more about Forms, or if you’d like assistance deciding which tool to use. ITS also has a curated playlist on LinkedIn Learning. Please be sure to activate your free LinkedIn Learning account first.  

Click here to view the LinkedIn Learning playlist on Microsoft Forms  

How can I learn more about Qualtrics? 

As a complex tool, Clark contracts with Qualtrics to provide support for all users. Qualtrics Support offers extensive videos, how-to guides, and survey best practices on their website (Qualtrics Support) and their YouTube Channel.  Additionally, you can receive personalized support from a Qualtrics expert by chat, email or over the phone. Click here to learn more about getting Qualtrics Support. 


Office 2021: Available Now for Faculty and Staff

Office 2021

Microsoft Office has been available since 1990. Over the past 33 years, the tools included in the Office suite, such as Word, Outlook, and Excel, have expanded and improved (to see just how much, scroll through the visual history of Microsoft Word).

ITS is excited to announce that Office 2021 is now available as an optional update on most Clark-provided Windows computers for faculty and staff. Labs and public computing spaces will be updated over the Summer.

How Do I Update?

Update to Office 2021 by following these step-by-step instructions. If you’d like further guidance on using the new features and functions discussed in this article, please contact techtraining@clarku.edu.

Why Should I Update?

Curious about what this update has in store? Keep reading to learn more about the exciting changes coming to a (Windows) screen near you!

Accessibility Checker

Microsoft’s accessibility checker is now available in Word, Excel, and PowerPoint. This tool identifies ways you can make your document or presentation more accessible for everyone, including adding alternative text for images and optimizing file format for screen reading. You can see these suggestions by going to the “Review” tab in any of these three tools.

Dark Mode in Microsoft Word

Late night writing session? Turn on dark mode in Microsoft Word to reduce blue light exposure, which can contribute to eyestrain and headaches. Bonus: using applications in the dark mode can save battery power on your laptop, tablet, or phone.

XLookup in Excel

If you’ve ever used HLookup or VLookup in Excel, you know that they are extremely powerful and frequently tricky functions. XLookup is their sleeker younger sibling, which doesn’t require you to specify the direction of your data and simplifies formula input. Check out this YouTube video to learn more about how this function can save you time.

Cat with a crown

A cat with a crown

Improved Drawing and Ink

Do you like to scribble over your data or lecture slides? Office 2021 includes improved drawing and ink functionality in Word, Excel, and PowerPoint. You can even replay your annotations if presenting information to a group or enhance existing pictures for research (or for your beloved pet).

Translate emails in Outlook

Many Clarkies communicate in multiple languages or collaborate with international colleagues. Outlook for Windows can now quickly and easily translate incoming or outgoing messages into another language to improve communication. Follow Microsoft’s instructions to learn how to enable this feature.

Tool Spotlight: Whiteboards in Virtual Meetings

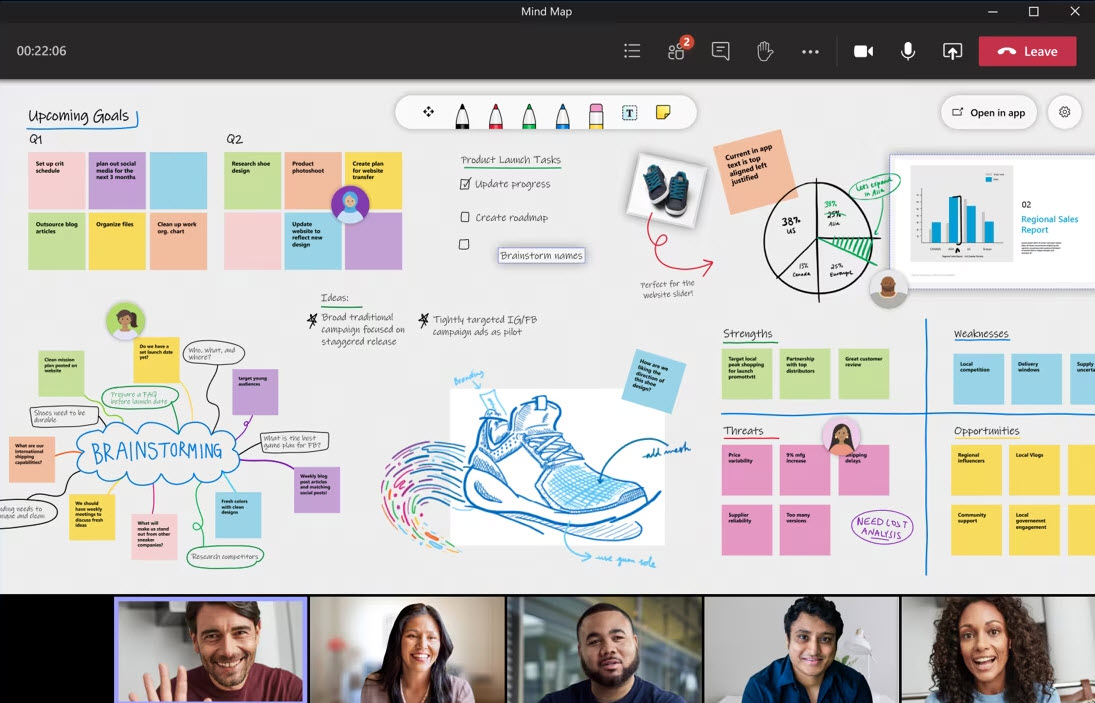
Screenshot of a whiteboard

These days, Clark classes, meetings, and events often take place virtually in Teams or Zoom. While many of us know about the basic features of these online spaces, such as chat and screensharing, including a digital whiteboard in your next virtual gathering can be a unique, collaborative, and fun way to engage your fellow Clarkies. Whether you’re brainstorming ideas for a group project or outlining goals for a staff initiative, whiteboards can help the ideas flow!

How do I create a whiteboard?

In either Teams or Zoom, navigate to the screen-sharing option. When you opt to share your screen, the software presents you with a few different options: you can elect to share your whole screen, one app, or a whiteboard. Choose the whiteboard option, and everyone in the meeting will be able to see it and, if you choose, interact with it.

What can I do in a whiteboard?

The beauty of a whiteboard is that it is more open-ended than a traditional Word document that is typically used to take meeting notes. Once the whiteboard is open, everyone will have access to a toolbar. By selecting different options from this toolbar, meeting participants can type new text, draw diagrams, and add shapes such as hearts or arrows to draw attention to different parts or ideas. These functions vary a little between Teams and Zoom (in Teams, for example, you can add images or add flow chart templates to your whiteboard), but both are intuitive and easy to use.

What happens next?

Zoom users can choose to save the whiteboard to their device as a picture or PDF. Those who work in Teams will notice that the whiteboard will be added to the meeting chat after the meeting itself ends, and, depending on your account settings, may also be automatically saved in OneDrive.

I want to try this, but can I practice first?

Yes! Please reach out to techtraining@clarku.edu to learn more about this wonderful tool and how to use it.

OneDrive and SharePoint and Teams, Oh My!

Around campus, your colleague or classmate might mention that they’re saving their research to OneDrive. You might get automated emails from SharePoint regarding collaborative documents that you’ve posted in Teams. All of these tools are Microsoft platforms are related to the cloud, but what do they do? How do they interact?

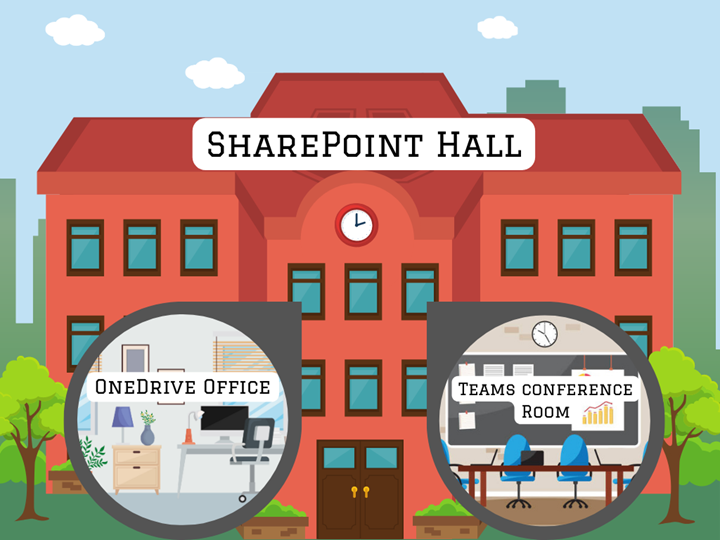
Teams, OneDrive, and SharePoint are all connected, but they are not the same thing. Each has different functions and interactions with one another, so it’s helpful to think of these tools as different parts of a whole, like the building below.

Microsoft Campus

OneDrive is like your office: it is your personal space to store documents, notes, research, and organize as you please. No one can enter your office unless you invite them in. It’s ideal for your own projects, and maybe collaborating with a few colleagues, but it’s not suited for larger meetings or projects.

Teams is like a conference room where you regularly meet with different campus groups you’re a part of, whether that is a department or a club. Here, you can iron out ideas, collaborate on new projects, and get updates related to ongoing group goals. You might bring some of your own work, such as a proposal, picture, or agenda, into this conference room.

SharePoint is the university hall where both your OneDrive office and your Teams conference room live. It keeps the internet and lights running in both places, but you mostly keep your work within your own office or department space rather than in the other rooms and closets around the building.

So, when people say, “It’s on SharePoint,” they usually mean, more specifically, it’s been shared in OneDrive or Teams, similar to how someone might tell you to “come see me in Carlson” when they really mean their office in Carlson. On rare occasions, such as for university events or programs, you might need to use the whole building (or, digitally, the SharePoint platform), but these cases should be discussed with ITS.

More questions? Reach out to techtraining@clarku.edu to learn more!

Tool Spotlight: Name Coach

NameCoach

Now that Clark University is on Canvas, all Clarkies have access to a great new tool that allows everyone to record the correct pronunciation of their name for colleagues, professors, and classmates: NameCoach!

What is NameCoach?

NameCoach is software built into Canvas that allows all members of the Clark community to record the pronunciation of their names. These recordings are then made available to professors, classmates, and colleagues within the same courses, so not only can you record your own name for others, but you can also listen and learn the correct pronunciations of people’s names in your class or department.

Margo ForemanWhy should I use NameCoach?

Margo Foreman, Clark’s Vice President and Chief Officer of Diversity, Equity, and Inclusion, strongly recommends all Clarkies to record their name in NameCoach to ensure all people on campus are respected. Vice President Foreman suggests,

“I encourage every student to utilize the NameCoach app to record their name. As a matter of pride and in order for others to respect the uniqueness of your name and its pronunciation, please slowly annunciate your name to help others discern how to appropriately articulate it. I suggest users break the pronunciation of their names down by syllable or phonetically then, repeat it fluidly but not fast.”

How do I record my name or listen to pronunciations?

Click here see step-by-step directions for recording your name and listening to the recordings of others.

New Tech: ITS WebBot & Screen Sharing

ITS WebBot

Looking for quick answers to quick questions? While the Help Desk is always here to help, we have launched a WebBot on the ITS website to help community members find information even more easily. Ask the Bot a question and it will point you towards resources on the website that may help. While it is learning, even if it can’t find the correct answer, it will allow you to create a Help Desk ticket. Check it out now on the ITS Website.

Screen Sharing

We’re excited to announce after a successful pilot last year, that most ITS-managed classrooms across campus now have the ability for faculty, students or any participant to wirelessly present from their personal device to the projector. Using phones, tablets, or laptops, any member of your learning community can now, with a few clicks, display their screen to the class.

Tool Spotlight: Microsoft Forms

Have you ever wished that you could quickly collect information from your class, student group, department or others? If so, you’ve probably dabbled with Qualtrics, our survey tool. While Qualtrics is a sophisticated, market-leading survey tool, it can be a little complicated for basic information collection.

In cases where Qualtrics is ‘too much’, consider Microsoft Forms, available now to all staff, faculty and students. Forms allows you to quickly and easily create short online forms to collect information from groups, and offers common question types including multiple choice, short and long text entry and Likert-scale. Additionally, it is very easy to restrict participation to users with Clark credentials, and export responses as Excel files or as a graphical report.

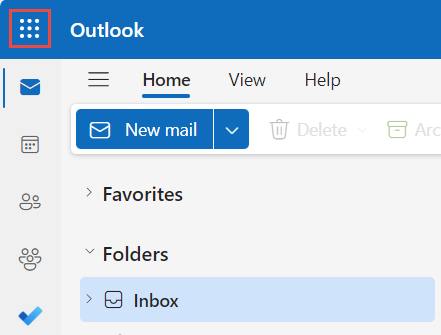
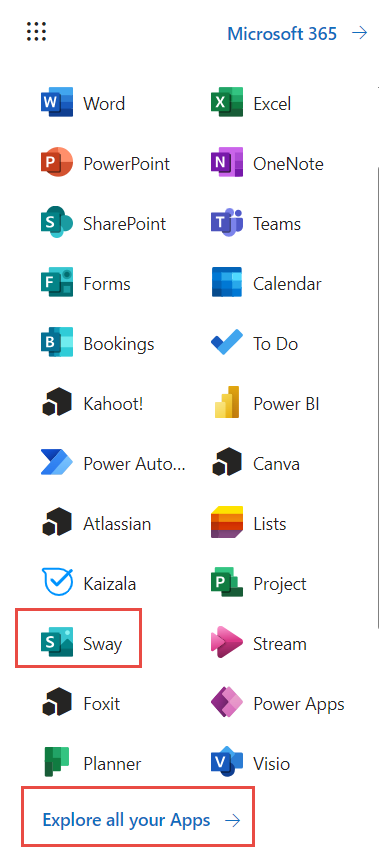
Access Microsoft Forms by clicking here: https://forms.office.com/ or in your Microsoft 365 portal, by clicking the “Waffle icon” (9 dots) in the top left of your screen. If you don’t see Forms there, click All Apps.

Click here to access a Microsoft Forms Essentials Course in Linked in Learning (click here to learn more about LinkedIn Learning at Clark).


Tool Spotlight: Software Center

Software Center allows quick and easy installation of common software on Clark-managed Windows devices across campus. The software available in Software Center will differ depending on the location of the device but common software includes:

  • Foxit PDF Reader
  • VLC Player (for video playback)
  • Skype
  • Microsoft Teams
  • Chrome and Firefox
  • 7Zip File Extractor

In addition to these, some Clark computers will also allow you to install specialist academic programs such as Anaconda Python, ArcGIS (Maps and Pro), RStudio and much more.

Installing Software from Software Center

When using a Clark-managed Windows computer while on campus or connected to VPN:

1. Click on the search icon in your Windows taskbar. (Don’t see a search icon? Click here for more instructions)

A picture of the windows dashboard and an arrow highlighting the search icon

2. Type Software Center and click on the icon to open

a screen shot of the software center icon

3. In Software Center you’ll see all of the software that you have the ability to install on the device.

4. Click on the software you wish to install. You will see information including the version.

5. Click install to begin the installation. If there is only an “Uninstall” button, that indicates that the software is already installed on the device.

For more information on Software Center, or the different software available to you to install on a Clark device, please contact the Help Desk (helpdesk@clarku.edu, 508 793 7745)